The trials and tribulations of quilt pattern making

Goodness, quilt pattern making is hard.  I never realized just how hard until I started work on the Sailor Moon quilt.

First off, trying to figure out how much fabric I needed for this quilt has been… an adventure, to say the least.  I started off with very uneven amounts of old Sailor Moon fabric, and thought to myself, “okay, I’ll try out making a pattern where the main squares have a moon pattern in them, and then alternate them with 9-block squares!”  I roughed out a pattern based on 12-inch quilt squares, made up of 9 pieces, and figured I’d at least have enough Sailor Moon fabric to make that pattern work.

Side note: holy crap the Livescribe pen makes it super easy to share random notes like this

It was a great idea, and I was super excited – however, I’d actually ordered the fabric I was going to use for the quilt before I actually built the pattern.  Which was not the smartest idea I’ve ever had.  However, I cut my existing fabric into squares while I waited for the fat quarters I’d ordered from Spoonflower to come, and did some research to figure out how many 4.5 inch squares I could get out of a fat quarter.  Turns out, you can theoretically get sixteen 4.5 inch squares from a fat quarter!

If the fat quarter is appropriately sized, anyway.

For those of you who’ve never ordered from Spoonflower before, they custom print your chosen design on whatever fabric you choose at the time you order it.  Which is pretty darn cool, I think – but with the fat quarters, they’re not exactly a standard size – and on top of that, the printing was a little off, size-wise, resulting in some quilt squares that have a white border on one edge.  (I’m sure it’ll be hidden when I start piecing things together, but still, it’s annoying.)

Either I really suck at cutting, or something was off at the Spoonflower printers when I got that fabric printed…

I did, however, make a quilt pattern.  And I think it’ll look pretty cool, once made – but I’m not even sure I want to make it with this fabric, given all the ridiculousness with different amounts of different fabric patterns and all. I might end up doing the disappearing 9-patch pattern I’ve seen around the internet, though – I’ve been wanting to try it for a while, and with a couple solid fat quarters, I should easily be able to make it.  What I will do with that pattern, instead, is polish it up into a nice PDF and possibly post it here for people to test out, if I’ve got any followers who are nerdy quilters who’d want to beta test a pattern for me…

And you know what’s really sad?  I finally got the solid colored fat quarters I needed to help break up the crazy patterns, and I still haven’t cut them up yet.  I’ve had them for a few weeks now and haven’t touched them.  Maybe when I’m on vacation, I’ll finally tackle this quilt in earnest…

The Crafty Nerd gets her nerdy crafting on, finally (and rambles a lot in the process)

Or at least I will be, once Spoonflower ships out my latest fabric order.

So, there’s a bit of a story behind this latest crafting endeavor.  Maybe two stories, actually, that converge into one – but they both focus on my favorite anime ever, Sailor Moon.  The first story is from about… gosh, ten years ago.  (It really doesn’t feel like that long ago!)  A close friend of mine, Katie, bought me some Sailor Moon fabric for my birthday – at least I think it was for my birthday, it’s been so long ago that I’m not entirely sure.  I ended up using some of it for craft projects, a little of it for some Gamma Sigma Sigma shirts (yes, I was in a sorority, but not your typical one!), and then stashed the rest away because I couldn’t think of a good project to use it in, and I didn’t want to use it all up.

Fast forward about ten years, and look what’s still lingering in my fabric stash…

These are the oldest pieces of fabric I’ve got right now – I’ve managed to hang onto them through a LOT of life changes!

Now, recently I’ve had a resurgence of Sailor Moon fangirling – mostly because I got hit with the best idea for a Halloween costume ever.  I remembered seeing a Sailor Moon costume at my local costume shop about a year and a half ago, and while I didn’t have the chance to look at it too much when I’d seen it, I figured if it was a decent costume I’d snag it and maybe make some modifications to it after Halloween to make it fit for cosplaying.  Shortly before Halloween, I went over to Campus Costumes to go seek out that Sailor Moon costume – it was a long shot, as it’d been a while since I’d seen it, but maybe I’d be lucky, right?

Well, after a half hour of searching, one of the store clerks asked what I was looking for, and I told him.  And he said “Well, we’ve got one in rentals – I don’t think they ever sold very well, so we only hung onto one.  I bet if you ask the owner, she’ll sell it to you, though.”  And he walked me over to the rental costumes, and there it was – a store-bought Sailor Moon costume that actually looked halfway decent.  I brought it to the counter, trying to suppress the squeeing of my inner 17-year-old (who tried and was marginally successful at making her own Sailor Moon costume), and politely asked if I could maybe buy the costume.  I’d been looking for it forever, I told her, and I’ve been a huge Sailor Moon fan since forever, and I’ll totally pay the $60 price tag on the front, if you’ll please sell it to me.  I’ll admit, I probably got rambly.

She took one look at the costume, said “eh, I can probably order another one… For $60, it’s yours.”

And I walked out the door with a Sailor Moon costume that actually looked GOOD.

Then I had another dilemma: the wig.  There was no way in hell I’d be able to get a cheap store-bought wig to look remotely close to Sailor Moon’s trademark odango.  I flailed around with the cheap yellow wig I’d bought for about a half hour, unsuccessfully trying to get it into pigtails or even just some buns, when it hit me: I knew someone who might have a Sailor Moon wig I could borrow.  And they lived right across the street.

Yes, I asked my neighbor if they still had a Sailor Moon wig, and if so, could I borrow it.  And the answer to both questions was yes.  (I have some of the best neighbors ever, I swear.  I’m not even going to get into the fangirl flailiness that happened when I went across the street and saw all the Sailor Moon posters hung up at my neighbor’s house, haha.)

So I totally dressed up as Sailor Moon this Halloween, and loved every second of it.

I couldn’t stop squeeing whenever I walked past a mirror and caught sight of myself, haha.

So that finally brings me to this nerdy craft project I’m going to start, which will probably be the first of many Sailor Moon themed craft projects I’ll be working on until convention season starts next year.  You all know I’ve been obsessed with making quilts since the beginning of the year, and when I came across that little stash of old Sailor Moon fabric I’d been hanging onto, it hit me: I should make it into a quilt.  And with the help of some awesome artists on Spoonflower who made some delightful Sailor Moon themed fabric, and a handy sale on fat quarters, my Sailor Moon quilt will be a reality.  (Once I get the fabric, anyway.)

My first challenge will be to make a pattern that’ll work well with the fabric I’ve got – I’ve never actually designed a quilt before, but it shouldn’t be hard.  (The hard part’ll probably be putting it all together correctly!)  I might just design a couple of squares that I can then put together to make the quilt, or find some existing patterns that I could take parts from and reuse as I need to.  I’m actually really excited about having a nerdy project to work on – it’s been entirely too long since I made a nerdy craft project.  The closest I’ve come recently is making a pair of socks with some yarn that’s Twilight Sparkle colored, but that almost feels like it doesn’t count, because it’s socks…

I’ll be posting pictures and rambling about my progress on the quilt from time to time – hopefully it’ll encourage me to start posting regularly again, too.

Gen Con 50: The Events

Gen Con is usually packed full of all sorts of awesome events, and Gen Con 50 was no different.  I only ended up going to a couple of events this year – I might have done more if we had a hotel, but I didn’t want to end up overwhelming myself, so I went event-lite.  (And even then, I ended up skipping two events because I was exhausted, bleh.)  The ones I did get to go to were fantastic, though – I did some crafting, some book signings, and got to introduce Ross and J to my favorite Gen Con event ever…

An Evening with Patrick Rothfuss

Yes, I started out my Gen Con with some Pat Rothfuss. Did you expect anything different?

Of course the first event of Gen Con 50 that I went to was An Evening with Patrick Rothfuss.  It was a great way to start out the con – two hours with one of my favorite authors!  I brought Ross and J along – Ross has heard me ramble on about Pat and how awesome he is, both as an author and in general, and while J’s a fan of Pat’s (in fact, that’s how we met – J saw my talent pipes while we were at an academic conference together, and said “hey, are those talent pipes?” and I got all flaily and excited), he’d never actually been to An Evening With Patrick Rothfuss before.  So we all went, and oh, it was even better than when I went in 2013.  We all filled up a ballroom this time – the 2013 event only had 200 people, but this year there were 1200 seats with a line of people waiting outside!  It was super exciting, and Ross and J and I couldn’t wait for Pat to get on stage.

Even Ross was excited, and he’d only read The Princess and Mr. Whiffle and the Thing Beneath The Bed, hahaha.

It was run similarly to the 2013 session, with him giving us the option of having a session we could record, where he’d be less candid about things and a little more censored, or we could put our phones and cameras away and we’d all get to pretty much hang out with Pat.  I don’t think anyone raised their hands when he asked if we wanted to record the session, hah.  Pat broke the session up into a couple of different chunks – he’d answer questions from the audience, with mix of notecards with people’s questions and people asking out loud, and he also read us both of the Princess and Mr. Whiffle books.  (If you haven’t read them, you definitely should – but don’t let your kids read them until you’ve seen what’s in them, haha.)  While answering questions, Pat rambled on about great things – mental health, raising kids, silly random things, and life in general.  I especially appreciated his discussion on mental health – as someone who deals with anxiety, depression, and ADHD, it’s good to hear one of my favorite authors publicly encouraging people to go to therapy – even if they don’t really think they need it.  Having someone to talk to about life and all that goes on in it, someone who’s not currently connected to everything you’re experiencing and can provide an outside perspective, is pretty much essential to keeping yourself emotionally in good shape.  I love that Pat cares about us all enough to tell us “go to therapy!”

Things weren’t all seriousness, though.  He told us some adorable stories about his kids, and even sang to us in the process!  He sang a couple of songs, very briefly, from the Rankin Bass version of The Hobbit, which was great. (And reminded me that I really need to see that version of The Hobbit.  I’ve got it on DVD somewhere…)  The questions from the audience were great, and the more amusing ones that stuck out in my mind included “Can I go to dinner with you?”, “Could you have Lin-Manuel Miranda call my wife?”, and “If you had to choose between breaking both your legs and eating 10,000 Go-Gurts, which would you choose?” J asked a question that made me giggle – “If you were to cast a live action version of Slow Regard of Silent Things, who would you cast for the inanimate objects?”  Pat initially responded with Nathan Fillion, which got us all cheering, then he thought about it, realized we were cheering because we all love Nathan Fillion, and changed his mind to Keanu Reeves, which was actually way funnier, hah.  (Oh, Keanu Reeves and your uninspired acting…)  Much like the 2013 event, the evening ended with all of us singing together – which was delightful.  I’m really glad I managed to get tickets to this event.

Featherweight Armor for Costuming

I got to learn about making costume armor from Agent Peggy Carter and her friend, haha.

This was a great workshop, put on by the fine folks at …And Sewing is Half The Battle!  I learned so much about new materials for making cosplay props and armor, and new ways to use materials I’ve worked with before, like craft foam.  And I picked up some techniques to make things look their best, and also learned how to be safe while working with some slightly more hazardous materials.  I even got the chance to work with some Worbla, which I’d never used before!  I also found out I probably need to add a heat gun to my crafting arsenal.

Bracers in progress!

The folks at …And Sewing is Half the Battle did a fantastic job with the workshop, and were really thorough – they showed all sorts of materials to work with, talked about the pros and cons of each, and detailed any safety measures you might need to take when working with certain materials.  I hope Gen Con gives them a bigger room next year – this one definitely needs more space for everyone to work in, especially when we’re trying to use heat guns, haha. It was overall an awesome session – and it’s given me lots of ideas for next year’s costumes!

Brandon Sanderson book signing

I did not actually get to take a photo of Brandon Sanderson, so here’s one from the internet.

I only recently got into Sanderson’s books, and have been reading them pretty much since May – I tore through all six books of Mistborn, and then the two books of The Stormlight Archives.  (I’m now very eagerly awaiting the third Stormlight Archives book!)  His books are pretty darn awesome, and his writing style pulls you into the story and just won’t let go.  When I found out he was going to be at Gen Con, I knew I’d have to get a book of his signed – so I grabbed a hardcover copy of Mistborn: The Final Empire and on Saturday, I made my way over to his book signing.  I had lots of fun geeking out with other fans in line, especially over the end of Words of Radiance (don’t worry, I’m not going to spoil anything!).  It’s always fun to talk to people who share common interests with you!  When it was my turn to get my book signed, Sanderson was incredibly friendly, and he even commented on my Denna costume, from Pat Rothfuss’s Kingkiller Chronicles, with all of her names on a name tag, haha.  He told me to tell Pat Rothfuss that he doesn’t have to worry about releasing the third book in the Kingkiller Chronicles anytime soon, as he’s got a 3rd book in a fantasy series coming out this year so Pat can take his time, which made me giggle.  I really like how friendly Sanderson is – he was very approachable, and really warm and welcoming!  I’ll definitely get more of his books signed if he comes back to Gen Con next year.  (Which I’m pretty sure he will.)

Harry Potter Ornament Painting

This was a nice, relaxing event.  I’m really glad I signed up to do this.  I got to sit and paint for a little while, and chat with other Harry Potter fans, which was lots of fun!

Ornaments before painting.

These are some really nice ornaments – they’re made out of clay, and were fun to paint, albeit a little fiddly in some spots.  My painting job was… less than stellar in some spots, hah.

Here they are, freshly covered in Mod Podge!

Pat Rothfuss Book Signing

This turned out to be such an epic event for me that I’m going to make it into its own post. So stay tuned.

In short, I had loads of fun at all the events I went to this year – and I’m seriously pondering hosting some sort of crafting event next year…

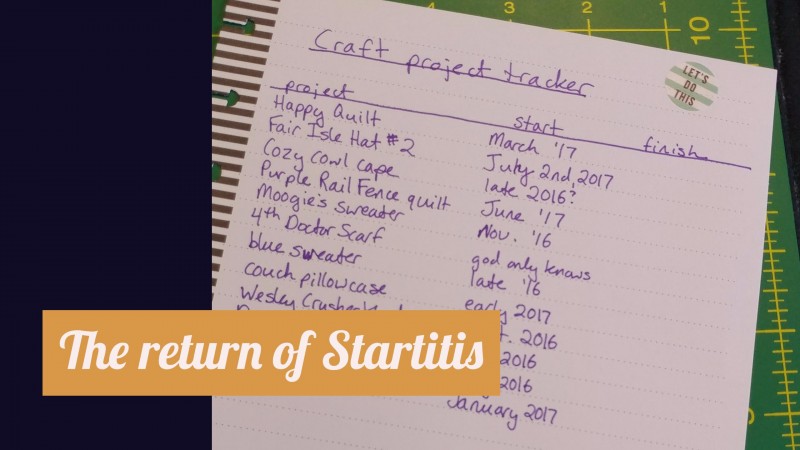
The return of Startitis

Well, to be completely honest, it probably never left in the first place.

Ah, here we are again, making lists of unfinished projects…

As part of me trying to get some craft projects actually finished instead of lurking around my craft room or piled in the closet, I made a list of what I know I’ve started and haven’t finished yet.  And I gave myself an ultimatum: no spending money on craft supplies until I finish a good chunk of these projects.

Yes, that’s right – The Crafty Nerd isn’t going to buy craft supplies.  It’s scary, right?

Continue reading →

Speed crafting: the 3-hour tabard

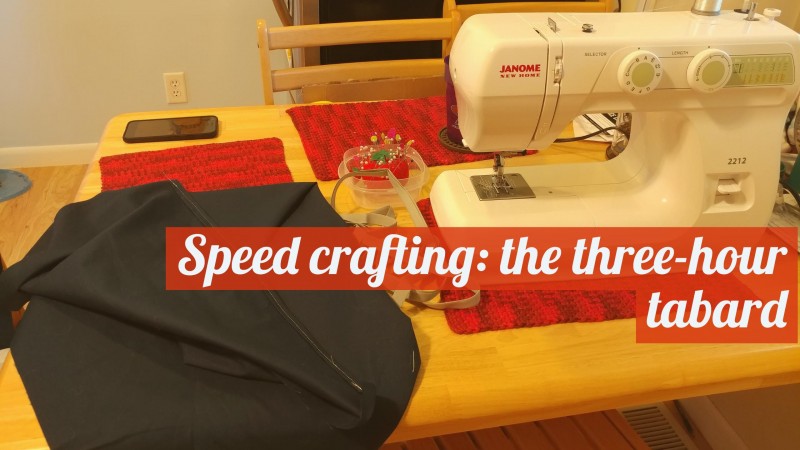
Sometimes, you just have to spend three hours of your evening helping a friend out with some speed crafting.

In this case, my friend J (who runs the Kishar LARP I’m part of) was feeling a little panicked by the fact that he’s got a Game of Thrones LARP to go to this weekend, and didn’t have time to make a tabard to go over his leather armor to match his house’s colors.  With all the other things he had to tackle before Saturday, what was he to do?

Enter the Crafty Nerd and her trusty sewing machine! I volunteered to put my new Janome sewing machine to work and see if I could possibly crank out a tabard for him before Saturday.

Continue reading →

LARP costuming: a different type of cosplay

You might have noticed from my post in March that I started LARPing recently, and oh how fun it is – it’s like Gen Con meets summer camp! It really is.  There were two big things that were a little intimidating to me as I got started, though: costuming and fighting.

Fighting is something I can probably get better at with practice, but costuming?  Most of the costumes I have in my closet are either My Little Pony, steampunk, or renaissance faire appropriate – and Kishar has an Asian/Arabian Nights mix of costuming and setting  – how do I get myself costumed for this?  And how do I get myself costumed in a way that everyone’s not going to look at me with pity because I’m a newbie who has no idea what she’s doing?  I’m so used to just regular cosplay – I’ve got a character that I can then make a costume for, whether it’s an existing outfit that a character’s established as something they wear, or something inspired by a character (like Pinkie Pie – she doesn’t often wear clothes, heh.)  Starting from scratch was intimidating as all heck.

I ended up tackling this in a couple of steps, once I got over being so overwhelmed by the daunting prospect of not only creating a character, but costuming one too.

The first thing I did: asked for help.  Lots of it.  J and Kasi were extremely helpful in determining what would make good costume pieces, but then again, since they run the game, they know what’s good for costuming!

Next: I cruised Amazon, Etsy, and other places to find things that I might not be able to make on my own, like elf ears.  There’s a lot of places out there where you can buy LARP gear – and again, I asked J and Kasi for suggestions on where to shop, so I made sure I was getting quality stuff.

After that: I dug through my existing costuming to see what would work.  The results: a fair bit of my costuming was easily repurposable for my character’s costume.  Even stuff I didn’t initially think would be good, like some of my steampunk stuff (the little bag I showed off in this post about my steampunk gear works crazily well!) and a lovely bag my mom-in-law bought me for my birthday, ended up being pulled in as costuming bits.

Lastly: I made some stuff. (I mean, come on, I’m The Crafty Nerd, after all!) like my spell packet bag (which is ugly but functional) and my overdress bits (unsure what to call them, but we’ll stick with overdress).  And as I went through all that, I started to come up with a fair idea of what I wanted to wear.

When figuring out my costume, I had a couple of criteria for what I’d be wearing:

  • one: it had to look good.  I didn’t want to be the one awkwardly dressed noob at my first game.
  • two: it had to be somewhat comfortable. I’d be wearing this for hours, likely, while walking through the forest.
  • three: I had to be able to run in it.  No ifs, ands or buts. I knew I was gonna have to run from monsters at some point

With those three things in mind, and a giant list of ideas added to my Amazon Wishlist, I ended up emerging with two costumes – one of which I wore to my first game!

I’m the one with the SUPER OBVIOUS elf ears, borrowed for the game. I now have a pair of more subtle ones, aheheh.

I ended up deciding on two main costume styles: one with a dress, one with pants.

  • The dress outfit:
    • The dress, obviously: I chose this because it was light, flowy, and would probably make it so I don’t overheat while playing outdoors.  Plus, it was easy to alter to make it shorter, so I wasn’t tripping over it – I ended up taking off the bottom tier of the dress, because I’m short.
    • Corset vest: wanted some sort of corset, but wasn’t sure I’d want one that was super-sturdily boned – turns out this one is a little long for me, but I was able to get some corsets from Kasi that work that I can also wear with this dress!
    • Overdress bits: I made these myself, they’re the black pieces in the photo above that look like they’re extending from the corset.  I thought it’d make a nice touch to a fantasy costume – and it’s a work in progress, as I might add some embellishments to it such as embroidery.
    • Leggings under the dress: gotta keep my legs covered, because poison ivy/ticks/brambles are no fun.  These were a pair I’ve had hanging around for years.
    • Boots: My good ol’ scooter boots.  They handle tromping around in the forest pretty well.
  • The pants outfit:
    • Harem pants: oh lord these are comfy.  They haven’t made it out to an official game yet, but I bet these’ll be fantastic for running in.  And they’re light, too, so I won’t overheat in them.
    • Scarf:  this can be used as a belt, or a wrap, or to keep one’s hair back – the uses are endless!  love how versatile this is.
    • Corset:  planning on using one of the corsets I got from Kasi.
    • Shirt: I have a couple options here: a peasant shirt I made myself, or a peasant shirt I got from Kasi, or I could even use a tanktop if I wanted!
    • Kimono top: light, breezy, and setting-appropriate.  I can wear the scarf as a belt over it, or wear it loose over a costume.

So there you go!  For someone who’s never really done a LARP before, once I figured out how to get started, it was really easy to try and find costume pieces that were readily available, so I’ve got something to wear while I try and craft my own stuff from scratch!  Hopefully this will help out other new LARP players as you get geared up for your first game!

The quilt self-portrait

I recently finished my second quilt.  It’s nothing super fancy – I ordered a sampler pack of 10-inch squares of the Luna Sol sampler from Connecting Threads, cut them all in half, and stitched triangles together until I had a quilt.  Hand-quilting sounded like an amazing idea when I first finished it, and while I was absolutely tired of this quilt by the time I got to adding the binding, I am pretty happy with the hand quilting.

The quilt-in-progress – before I added the batting. And when I realized I stitched one row together with the triangles in the wrong direction.

This quilt is not without its faults.  As you can see in the picture, I stitched one row in the wrong direction – and didn’t realize it until I’d finally pieced the sucker out and laid it out for this picture.  I almost gave up on the darn thing then, to be honest, but then I took a closer look at that picture, and plotted out how I’d hand stitch things.  I ended up going with a sort-of lightning bolt arrangement of geometric shapes for the quilting.  It still looks a little awkward, but hey, I made it a beautiful sort of awkward.

Shortly after starting the hand quilting, I found another issue in the quilt – two squares weren’t exactly stitched together, and were coming apart in one corner.

It was at this point where I said “screw it, this quilt is already imperfect, I’m just going to stitch the hole closed and carry on, maybe patch over it when I’m done.”  And I did the patch you see above, and then went on about my quilting.

But the more I worked on this quilt, the more I saw it as something of a self-portrait.  It was imperfect, just like me.  It’s got some rough patches and parts that were hastily fixed.  It’s got some awkward bits.  But in the end?  It turned out beautiful.

The finished quilt, held up by Ross.

It’s a perfectly-sized little lap quilt, and I absolutely love how soft the fabric is.  Plus, the little bunnies are adorable.  (One of my nicknames is Beth-bun, so that may have highly influenced the choice of fabric, heh.)  Despite all the hiccups in making it, I love how it turned out.  And it really is a self portrait, in quilt form.  Awkward, not quite perfect, but wonderful all the same.

And good at snuggling cats.

Wait, you can do WHAT with washi tape?

I’ve only got a short post for you all this week, what with being wrapped up in work, and homework, and crafting (I’m sewing a quilt, you guys!  It’s kind of lopsided but it’s a quilt!) and all.  However, I wanted to share something that I discovered while looking up ways to keep your seams straight while sewing.

Yes, that is a quick-and-dirty fabric guide made with WASHI TAPE, of all things.

Why the heck didn’t I think of this before?!  It’s resulted in a much better visual measuring guide than just trying to line up the edge of my fabric with the edge of the presser foot.

And of course I get that figured out when I’m 90% done with the quilt top.  Of course.

Anyhow, figured I’d share this with everyone, especially those of you who machine sew – washi tape really can be used for everything! 😀


Seven awesome free nerdy crafts

I can’t think of anything to write this week, so instead, I’ve lovingly curated a collection of ten free nerdy crafts for you all.  (If my Facebook friends come through with cool post ideas, there may be a second post this week to make up for this one!)  It’s been a while since I’ve done one of these, so I figured, why not? So, here we go – seven nerdy free crafts!

Continue reading →

My knit and crochet tool kit

Every crafter has one (or more) – a tool kit they use to crank out their projects.  I’ve actually got a handful of little tool kits, for each of my main hobbies.  As I was digging around in my most frequently used one, my knit/crochet kit, I thought “hey, why not show off what’s in your yarn craft kit? Someone might find it useful to see what you’ve got!”  And this week’s blog post was born.

This collection of goodies helps me while I make yarn crafts.

It’s a random assortment of goodies, but they all help me out while I craft! Here’s what I’ve got, top to bottom, leftish to right:

  • Knit Happy bag: I got this as part of a yarn swap years ago on Ravelry.  I wasn’t quite sure what I’d use it for back then, but now it serves me well as the bag that holds all the tools I use frequently.
  • Gauge counter: I’ve had this ever since I started crocheting, back in the early 2000s, but never really used it until recently.  It’s been helpful as I try to figure out the gauge for my projects!
  • Yarn cutter: I love this.  It’s way easier than carrying a pair of scissors around, and is far more likely to be travel friendly than most scissors.  Plus, it’s fun having what my friend J calls a “yarn shuriken”, heehee.
  • Buttons: you never know when you’ll need a button.  This heart one was originally destined for a skirt I made years ago, then I almost put it on a sweater I made recently, and now it’s hanging out in my craft bag.
  • Measuring tape: This is helpful for so many reasons – measure the length of a tube sock, measure around a coffee mug for a cozy, measure myself to make sure an object will fit.  It’s great to have.
  • Hairclip: This little guy serves multiple purposes.  It can be used to hold two sides of a project together for seaming, as an impromptu stitch counter, and it can also keep your hair out of your eyes if it’s getting obnoxious while you work. 😛
  • Needle point protectors: You have no idea how many times I’ve tossed a knit project into my bag, only to find that it’s slid off my needles by the time I’ve gotten to my destination.  These things are a lifesaver – and a project saver.
  • Yarn needles and needle holder: Most projects I make are going to need to be sewn together at some point.  Having needles on hand is good – and having them all collected into one place is better.
  • Itty-bitty circular needles: Honestly, I think the only reason these are in here is so I don’t lose them elsewhere.  I’ve used them for making socks, but they’re not all that comfortable to work with, since they’re so wee.
  • Tin full of stitch markers: Self-explanatory.  Stitch markers are always needed.  I’m actually going to have to reload this with some more, as stitch markers tend to disappear easily.
  • Foldable scissors: Yeah, I’ve got the yarn shuriken, but sometimes it’s nice to use actual scissors.  They let me get a bit closer to a yarn project than the yarn cutter.  Plus, these guys collapse, too.
  • Labels, sassy and non-sassy: I’ve got these for when I make really nice garments for myself or others.  The sassy ones tend to find their way into my own clothes.

And that’s what I’ve got in my yarn tool kit!  What do you all keep in your crafting kits?